Purpose
To combine load cases created on the Create Special Loads window. This is the second part of a two-part process. The first part involves the creation of user-defined loads in the Special Loads window.
Prerequisites
User-defined loads
Steps
 Watch video - Print user load cases
To identify and combine user-defined loads:
- Click New to create a new load combination or click Edit to edit an existing load. For this example, a New load combination is created.
The Load Combination Editor displays.
- Select the User-Added load combination and click Edit.
Note: You cannot edit a program-generated load combination. User-generated load combinations are indicated with a Yes in the User column.
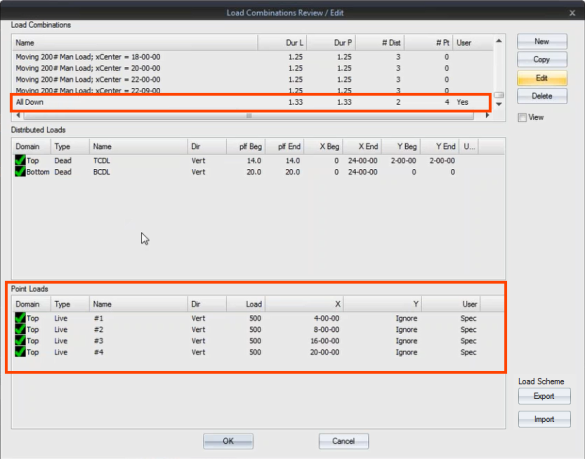
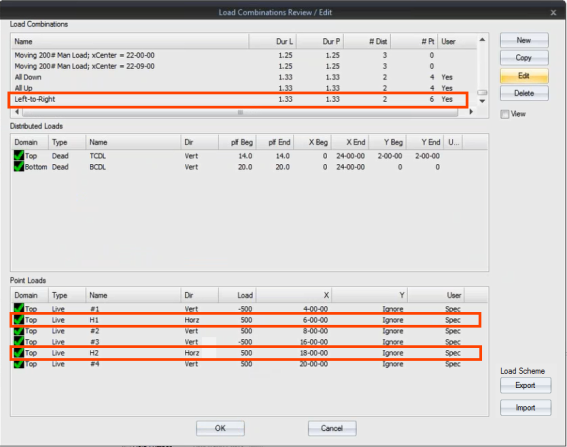
- Make edits to the load combination settings. A sample is shown below.
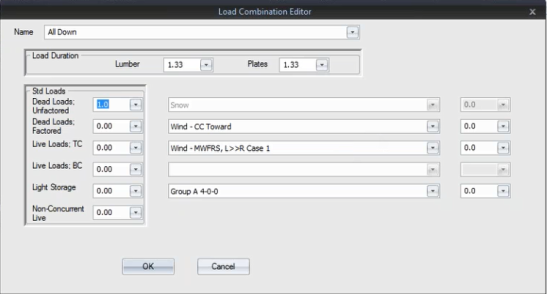
The last drop down list in the window displays all of the groups previously created in Create Special Loads. It's important to give the groups descriptive names since you can't see the loads in each group on this window; you will see only the group names.
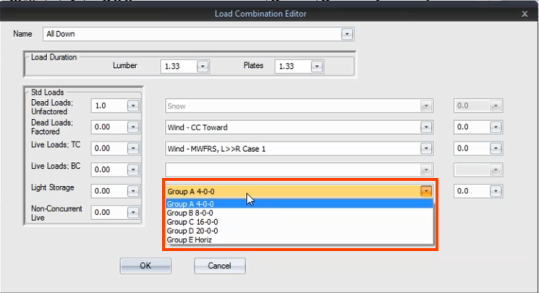
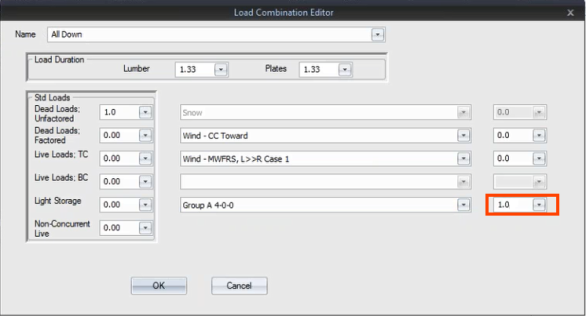
- Apply a factor to the selected group by entering the factor in the drop down box to the right of the group name. In this case, the same load factor (1.0) is applied to the first four groups in the list.
Note that a negative value is Up, Outward, or Left; a positive value is Down, Inward, or Right
- Click OK.
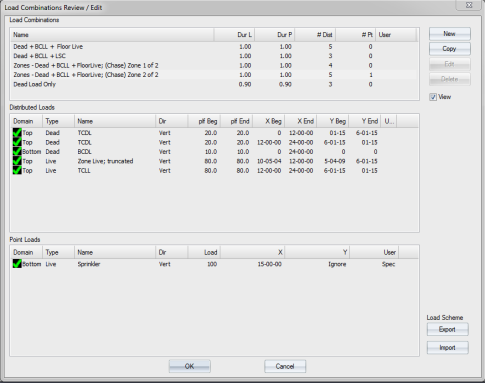
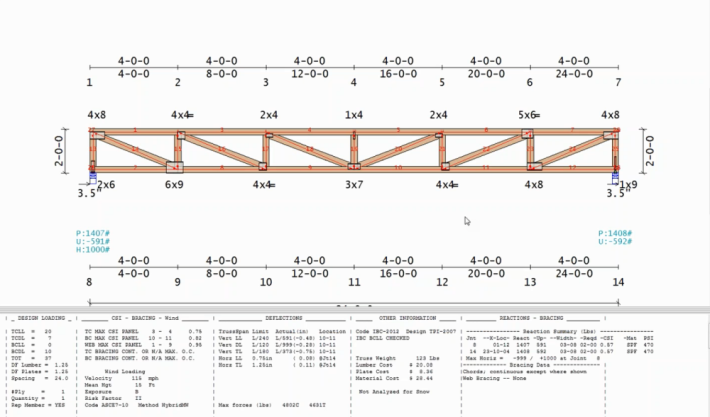
The new load combination, All Down, displays in the list, along with the point loads designed previously in Special Loads.
In the next steps, the same loads will be created in an upward direction.
- Select All Down and click Copy.
A copy of the load combination displays.
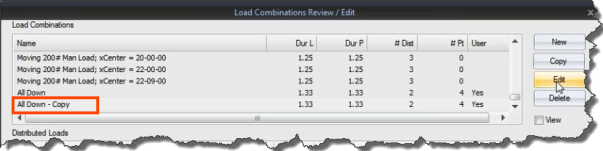
Change the name of the copied load combination to be more descriptive.
- Select All Down - Copy and click Edit.
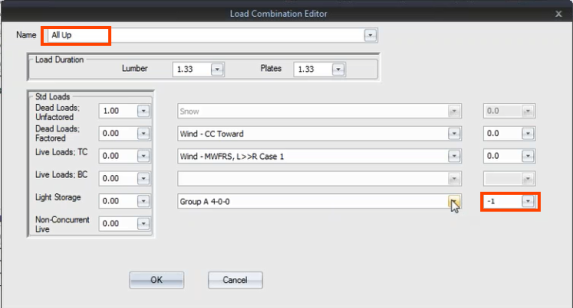
- Enter All Up for the load combination name.
- In the load factor box, change the load to a -1 factor for the first four groups in the list. This changes the downward load to an upward load.
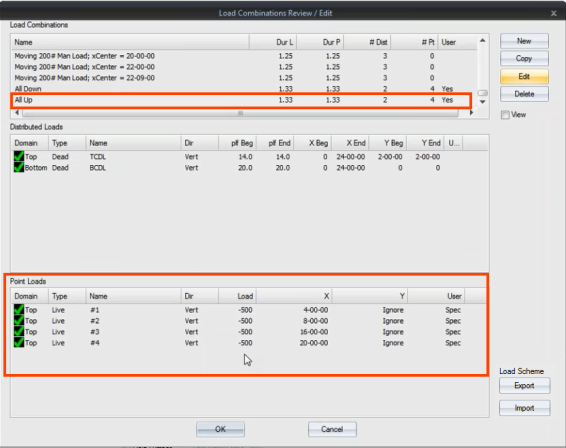
The resulting window looks like the following example.
You can continue creating load combinations. For example, you might want to add horizontal loads (left to right, right to left). A sample window is shown below.
- Click OK to save your changes.
- Click Run to apply all of the user-created load combinations.
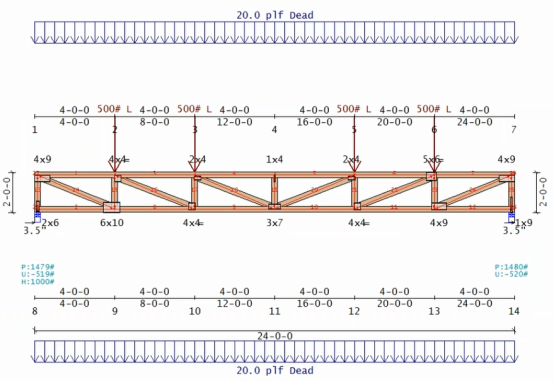
A sample is shown below.
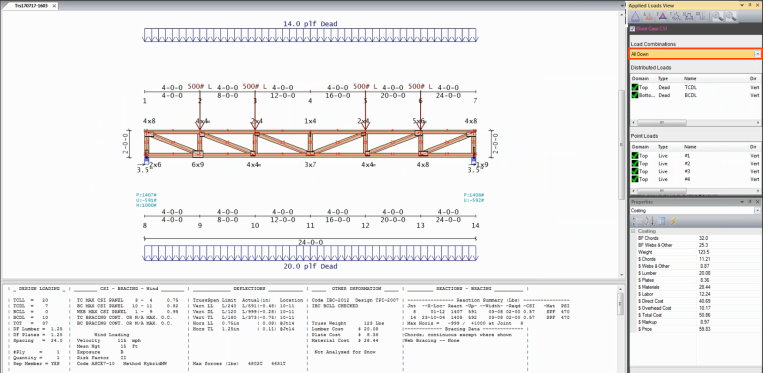
Note: To view the loads on the truss, display the View Applied Loads. A sample is shown below.
Editing User Created Load Combinations
You can easily edit a load combination without rebuilding the entire combination. A sample truss is shown below. In this example, the load factor is edited.
1. From the main Design view workspace, click Template Mgr.
The Load Template Manager window displays.
2. Click Std Load to display the Std Load window.
3. Change the TC Dead Load to 14 and click OK.
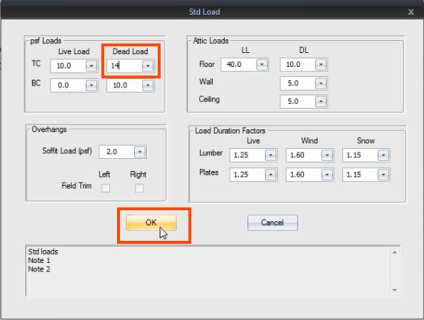
The application uses the user-defined information entered previously and combines it with application-generated loads to update the special load combination.
Similarly, if you want to edit or add a point load to the original special load, you can easily do that.
In this case, add a beam point load on the truss previously used.
1. Open the Point Load dialog and make the necessary edits. Sample input is shown below.
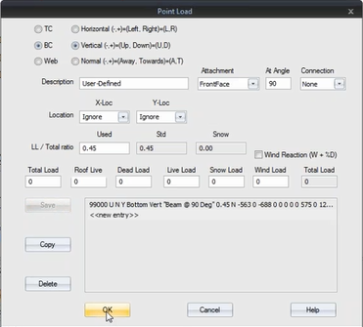
2. Save the changes and click OK.
3. Click OK again to close the Component Loading dialog.
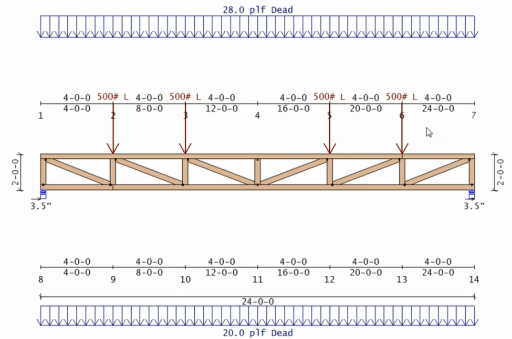
The truss displays with a 688 pound dead load added. This is the result of user point loads being combined with all other dead loads at a factor of 1.0 (as defined previously).

Note: You can print user load output by ensuring that Audit Load Cases is set to true in EnvData > AuditControls > AuditLoadcases.Also, the AuditAnalogs setting must be set to